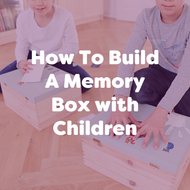
How To Build A Memory Box with Children
Posted by EYR Team on 19th May 2020
read more

Written by Kirsty Prankerd, Managing Director at keepsake and gifting brand Write From The Heart. In this article, she shares her tips for creating an educational memory box that your children will love to look back on in years to come.
It can be tough to keep thinking of new ways to keep the kids busy — and even trickier to make sure they're still learning and developing. Creating a memory box together is both a fun way to pass the time, and it’s also an educational activity with lots of opportunities for hands-on learning. Little ones will love to revisit their box in a few years' time when they're feeling nostalgic. And, it will be a wonderful keepsake for you to hold on to after your children have grown up, too. In this blog, I'll explain how you can do this.
The benefits of a memory box
A memory box is a place where your children can create a treasure of trove of childhood memories, including any toys, keepsakes, schoolwork, or anything else that they feel is special to them and which they want to preserve. They can then go back and revisit their memories as they grow up, or whenever they're feeling nostalgic.
Memory boxes are often used as a form of therapy to help children come to terms with a bereavement, but you can make one at any time, and it can really help to boost your mood and reduce anxiety. As such, it can be a very beneficial activity to help soothe children who may be feeling stressed.
Making a memory box has a number of educational benefits, too, so it’s a great activity if you're looking for a way to keep your child's learning going while school is closed. Focusing on the past and the future can help children to create goals for themselves and reflect on how they're developing. You can also use it to start a conversation about what your little ones hope to achieve as they grow up, and to encourage them to think about which talents and hobbies they'd like to nurture. And, there are also plenty of opportunities to do some arts and crafts and reading and writing while you create your box.
Last but not least, you'll be left with a beautiful and highly personal keepsake that you can look back at when you’re felling nostalgic or after your little ones have flown the nest in years to come.
How to create a memory box
1. Choose a box
Before you can get started, you'll need to find the perfect empty box. This should be big enough to fill with a selection of toys and art, but not so large it will be difficult to stow away somewhere. Don’t just reach for an old cardboard box or shoebox, though: you're going to want your memory box to last for years to come, so try to find something sturdy and well-made. Purpose made wooden boxes look wonderful and are built to last. You can also buy custom memory boxes, which can be personalised with your children's names, birthdates, and even a photograph.
2. Decorate!
Now that you've picked out the perfect box, you'll want to decorate it, so break out the craft supplies and start getting creative. Encourage your children to create a box which speaks to their individual personality: they could use stickers, paint, glitter… anything that takes their fancy. Placing a handprint or two somewhere on the box can also be a lovely touch, and kids will love to look back on how much bigger they've grown when they revisit their memory box in a few years' time.
3. Fill your box with treasures
Once your box is beautifully decorated (and any paint or glue has fully dried), you're ready to start filling it with some treasured memories. There's really no limit on what you can include: anything your little ones feel is special and personal to them can go in. If you’re not sure where to start, begin by having a conversation with your children about which belongings they associate with a particular memory, like an old toy, or a book they used to read when they were younger. Just try to not pick any objects you think your children will still want to play with: you don't want to finish your memory box only for your little ones to raid it a few days later!
Children love to look back and see how much they've grown physically, too, so include some hand and footprints or an old shoe or glove. You can also fill out a little record sheet to provide a snapshot of your child's life at this time: what's their favourite colour, or their favourite food, or their favourite film? This will let them see how their tastes have changed as they've grown up. Birthday cards, awards and certificates, and schoolwork can also make great additions, and will remind your kids of the special people and achievements from this time.
We would love to see how you get on! Send us pictures of your masterpieces on Facebook or Instagram by tagging us or using the hashtag #ExploreWithEYR.

