
How to make Finger Print Easter Cards
Posted by EYR Team on 16th Mar 2020
read more
Get the little ones excited for Easter and make your very own festive bunny cards! An ideal arts and crafts project for children aged 0-5 years old. Simply follow these instructions!
You will need:
How to make your Easter cards:
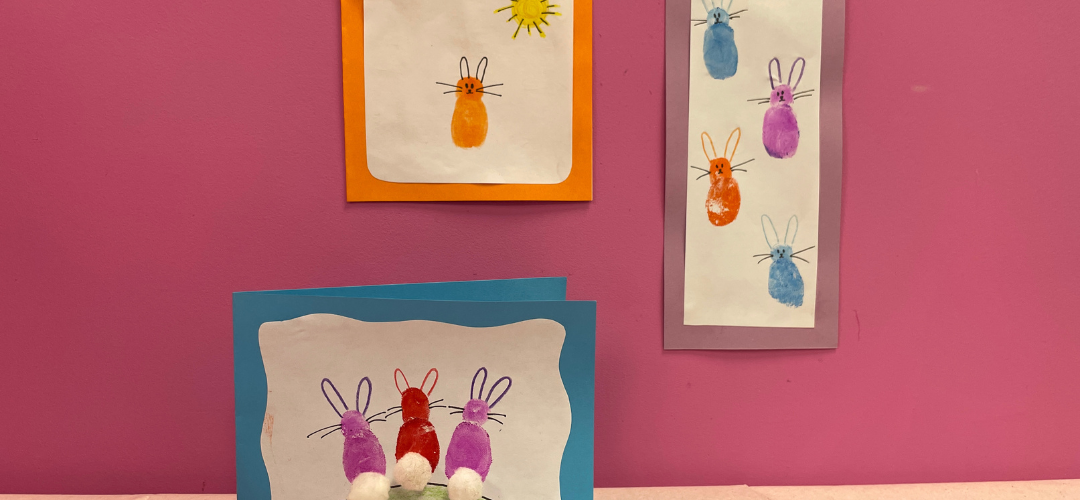
- To make the card, cut a 21cm by 14.8cm piece of turquoise card and fold in half, then cut a piece of white card 10cm by 10cm.
- Press your finger onto the ink pad and press down onto the white card to make the rabbits' bodies. Next, press your finger onto the pad again to make the heads. Leave to dry.
- To make the rabbit tails, add some glue onto mini white pom poms and stick into place
- Draw the ears and whiskers onto the rabbit’s heads with a black fine liner pen.
- Then draw on a hill and rays from the sun and mark on some grass with a felt tip pen.
- Stick the white card to the turquoise card.
Alternatives:
Why not make other Easter images, try yellow Easter chicks or decorated Easter eggs?
We would love to see how you get on! Send us pictures of your Easter card masterpieces on Facebook or Instagram by tagging us or using the hashtag #ExpploreWithEYR